How to start metal detecting? Metal detecting has become popular relatively recently, and it seems to stay popular for not that long, though. Why? Because this is a kind of a hobby with a finite resource. Since what you have dug out from the ground will never get back there.
So, the above-mentioned means that you should enjoy metal detecting while you can. This article will help you to know everything about metal detecting. You will find out what kind of treasures to look for and where; what metal detectors to use as well as how to clean and store your valuable findings.
Also, here there is information about the equipment and metal detectors you may need as well as how to avoid the most common metal detecting mistakes.
Contents
- 1 What are you expecting to get from metal detecting?
- 2 What you should be ready for after getting a metal detector
- 3 A few pieces of advice
- 4 How to select a site for treasure hunting
- 5 First metal detector
- 6 Basic metal detecting accessories and additional equipment
- 7 Pinpointers
- 8 How to dig your findings correctly?
- 9 How to clean your finding
What are you expecting to get from metal detecting?
This is the question you should answer right now: why do you want to take up this hobby? Answers are often very different. Here are the most popular ones:
- I want to get rich or to earn a little additionally in my free time.
- I like various coins, and I collect them. For me, this is a chance to find something rare.
- I like history, and I’m very excited to find some relics and to see this part of history with my own eyes.
- I’m an adrenaline junkie, and all these precious stones, troves, etc. they make me so excited
- I’m a fan of active rest, and I’d like to try something new as a hobby.
Let me say it right away – if you want to find a trove and become incredibly wealthy, such a motivation won’t last long. Those who took up this hobby to become millionaires fast and easy didn’t stay here for long.
Metal detecting is a hobby, not a business, and there is no chance to find treasures according to some schedule as well as not all findings are valuable. Of course, you’ve heard all these stories about diggers finding troves that cost millions, but they were unbelievably lucky, and this is a million to one chance to find something like this.
All other findings reported by detectorists are quite real. Moreover, you are very likely to find most of them and maybe something more valuable than those. For example, you’ll make new friends.
Yes, I’m serious – making some new friends is sometimes more precious than gold coins you may find. Especially if you are not that young…since this doesn’t happen that often at this age. I must say that having a good friend appears to be the most important in this hobby.
As for me, metal detecting is a way to know the history of my motherland. This is how I get unlimited information about the past of my country. Besides, I have a chance to see new places, enjoy the beauty of nature, communicate with my friends, etc.
Also, treasure hunting is a lottery; thus, this is the continuous source of excitement and adrenaline. When a metal detector emits a target signal, you never know what is hidden under the search coil: is it a gold coin or just a bottle cap. I guess luck in the main thing in this hobby.
However, only those who continue searching, whatever happens, they always get their valuable findings.
What you should be ready for after getting a metal detector
This is an expensive hobby
Metal detectors are not cheap, and if you become involved with this hobby, you will definitely want to upgrade your device each time the new metal detector model appears. Besides, over time you may need some additional equipment (interchangeable search coils of different sizes, protection cases, headphones, etc.).
In addition, quite often, you have to go quite far from home for a treasure-hunting trip, which is also costly. Then you finally get all the equipment you need and get something new only from time to time.
Prepare to dig out various trash
There is nothing you can do about it. The thing is that we’ve been on this planet for quite a long time, and this is the trash that we leave everywhere you’ll detect most of the time.
It had started since the Bronze Age when people discovered metalworking. In the 20th century, the utilization of metal objects in a household had become enormously large.
Sometimes when you go treasure hunting around some old settlements, the metal detector beeps all the time long.
You should dig all the signals received
This is the most crucial piece of advice to any beginner detectorist.
During your first digging season, dig all the signals you get. You should learn to feed the metal detector, understand how it works, and only after that adjust it to your personal requirements.
When reading various treasure hunters’ posts, very often, I see the topics where they say that they find gold after digging a signal that corresponded to a bottle cap. This is really the case, and you are not the first, and you won’t be the last, so don’t be lazy when metal detecting. This is laziness that stops a treasure hunter from becoming a successful one.
Thus don’t be lazy to dig some doubtful target signals.
Tell yourself – OK, let’s dig this one – this will take just a minute, but the result may surpass all expectations.
Even though you are sure that there is a bottle cap under the coil, what stops you from trying your luck and making sure that you got the target signal correctly?
That’s why this is my advice to you, and my rule – who digs more, finds more. Dig all target signals or at least every other.
In the beginning, I’d recommend digging all the signals. You need time to get used to the metal detector. In my opinion, it takes about 80 hours. Dig all the target signals and compare the sound and the readings of the device with what you find.
And believe me, then you won’t be even looking at the metal detector display. The signal sound will be enough for you.
Don’t be afraid of disappointments
As I’ve said, hoards or just some valuable findings, this isn’t something you find every day.
You can’t even imagine how many times I came home without any findings at all. I got up early, traveled far, spend the whole day walking around the places where only insane would go, I took off ticks, spiderweb, and other unpleasant things from me. And I found nothing!
I clenched the teeth, said that was it, and I’d quit this hobby. But several days later, I found myself treasure hunting again.
Because if you get keen on metal detecting, this passion will only die with you. There is definitely something about it…
A few pieces of advice
Ticks. You can’t imagine how I hate these. The worst thing is that they are everywhere, except North regions. So, keep in mind that in spring, as soon as it gets warm, ticks are already there. Not their bite is dangerous, but the consequences can be quite severe and unpleasant.

For example, one of these can be palsy or death due to encephalitis because these creatures are the carriers of dozens or even more illnesses. Therefore, I advise wearing some long-sleeved clothes, tucking trousers into boots or socks, and never ignoring using some tick repellents or sprays.
If you go treasure hunting in your car, make sure that it is in good mechanical working order, since in case if something breaks while you are in the forest or fields, it may be a serious problem.
It will be a good idea to get a power bank with you, which you can use to charge mobile phones with different sim-cards. The latter will give you a chance to connect to at least one mobile network if you find yourself far from large cities.
It is crucial to have a first aid kit with you. The most required medicines will not occupy much space, but in case of emergency, they will help you to stay healthy or even save your life.
Try to stay tuned to all metal detecting news. This area isn’t that changeable as everything around us, but it changes as well, especially in recent years. Read specialized forums, Facebook groups, subscribe to magazines such Western & Eastern Treasures or American Digger.
All those mentioned above will help you to broaden your knowledge about metal detecting and make the hobby even more exciting.
Below goes the most important…
How to select a site for treasure hunting
Here are the basic steps to understand how to find best places to metal detect.
Firstly, the article is written for anyone around the globe. As you see, there are countries which history dates back to very ancient times or countries that have become populated quite recently.
Actually, they’ve been inhabited for a long time already, but the people didn’t use any metal objects. Thus there is nothing to look for there with a metal detector.
Even if you talk about the largest English-speaking countries (USA, Australia, England), you’ll see a considerable difference between them.
However, our colleagues from Asia, Africa, Europe will also read this post, so let it be useful for all.
For this reason, everything written below will not work for everyone, but it will reflect a general tendency of people settling and give you some ideas on which places can be promising in terms of treasure hunting.
Secondly, it’s rather challenging to describe all possible search methods and areas that can be prospective for treasure hunting.
I classify these places according to their type to make the classification clearer and have something that helps to group them. But you may find out dozens of new classification ways, and it’s OK.
Thirdly, whenever you go metal detecting, make sure that what you are doing is legal there, and you have permission for this. I’m talking about parks, private property, private beaches, etc.
I intentionally don’t pay much attention to this issue, since any adult should be responsible for his actions, understand the consequences and make sure he doesn’t break any laws or cause a disturbance of the peace.
There is a Metal detecting code of conduct, and if you haven’t heard about it, you can read it.
Selecting a metal detector type is an important stage, but what is more important is a place where you’ll be treasure hunting.
I know that you have some specific location on your mind, and you think you’ll be the first digger to go there. Well, it is highly likely that you’ll be the 10th or even the 100th treasure hunter studying it.
Metal detecting doesn’t seem to be a popular hobby only until you take it up. Surprisingly, you see your colleagues everywhere. Correspondingly, every day there are less valuable findings under the ground.
What will happen if you get a metal detector, start going treasure hunting, but you find only various metal rubbish? Right, you get disappointed and sell the metal detector.
So, how to find the most promising sites for metal detecting?
Old maps
I’m sure this is the first thing that comes to your mind. Well, the same is about all the rest diggers. Therefore, don’t expect too much from this idea, especially if metal detecting is rather popular in your country.
Look for old maps on the internet, learn to process them, match ancient and modern maps.
Visit a local library, if you have a chance, and you will find lots of interesting stuff there.
Read historical literature about the area where you live. Local history experts and historians provide lots of useful information in their writings. Match the information you get with the maps.
A treasure hunter should have vast knowledge in various scientific areas: soil science, biology, sphragistics, numismatics, geography, history, etc.
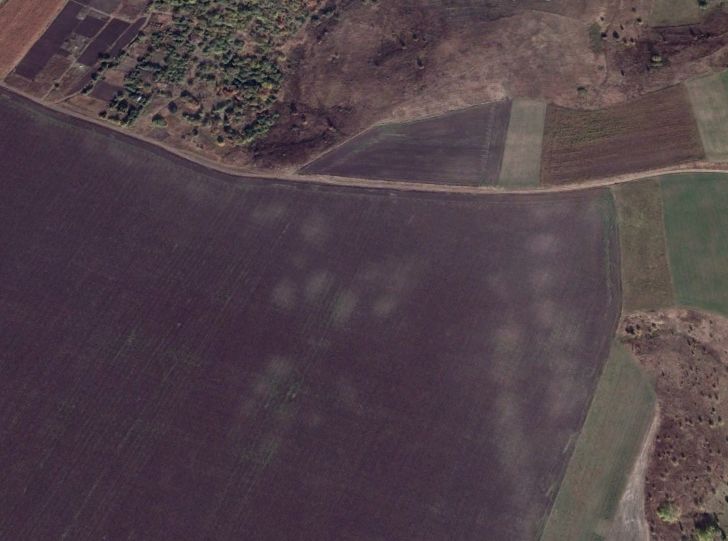
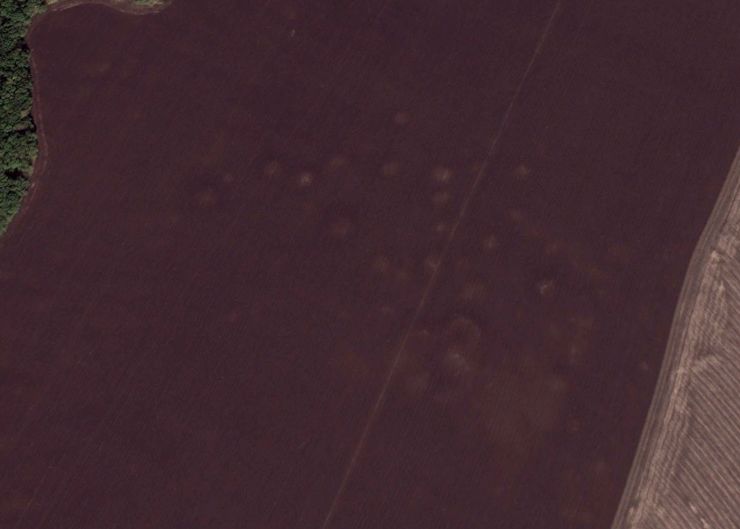
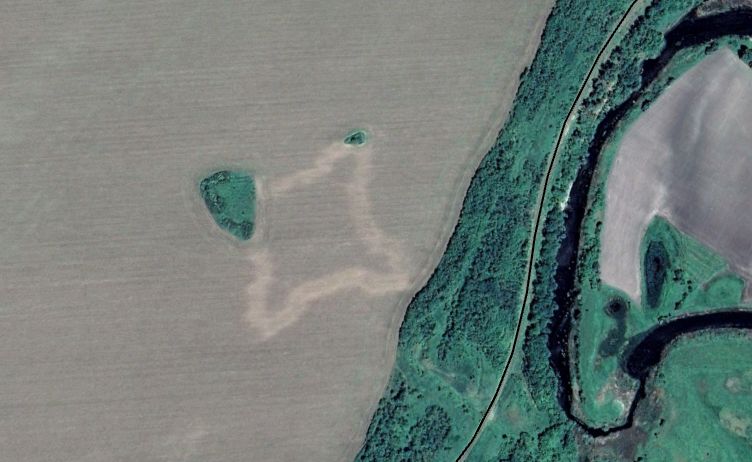
Learn to use Google Earth. It is a very helpful (free!) program for diggers. You can see the area that is of interest to you from the satellite, besides you can get images of this place made in different periods.
Look for various abnormalities such as spots on the fields, circles, tank cuts, fire trenches, earth mounds, etc. If you spend several days on this task, you’ll surely find several places that will seem prospective. Pls, find below some screenshots demonstrating what you should pay attention to.
One more advice of no small importance is – to observe trees and plants that you see around your treasure hunting area. These are one of your helpers in the process.
For example, if suddenly in the forest you find fruit trees, this is a strong indication that some people used to live here and it’s worth to start metal detecting at exactly this spot.
The same is about bindi-eye, smoldering ruins are its favorite places to grow. At that, it is visible that the plant grows only around the exact area of the burnt house.
Sources of fresh water
Most of the ancient settlements were located near water. They didn’t have any aqueducts, so people had to carry water to the place where they lived. Thus, this means that the settlement had to be as close to the water as possible. Besides, the river is a fast and convenient means of transport both in winter and in summer.
Shores of rivers, streams, and other water basins are potentially interesting places for a digger. Water has been of crucial importance at all times. Old roads used to go close to waterways. If a traveler could carry some water supply with him, animals needed water to dring during the way.
People needed convenient access to water, but at the same time, they wanted to be sure they wouldn’t get flooded during the seasonal flood. Thus, mountain coasts won’t do for this purpose as well as too flat shores – the settlement will be flooded.
Besides, the large cities that we located next to large rivers, they are still there. However, you should be interested in finding some small rivers, especially those that have already disappeared from the maps. Some small settlements might be there a long time ago.
If your country was inhabited in the medieval period and earlier, you should look for a flat coast of the river with good soil (black soils, not clayey ones) on the South. This will be a perfect place for the settlement you are looking for.
Brackish water – beaches
Nowadays, you should look for gold in the sea. Currently, there are almost no hoards left under water, while there are lots of small jewelry pieces there. Where people swim, they lose their gold or silver jewelry, since they don’t take it off before they go swimming.
Water has a lower temperature than the one outside, and due to vessel constriction, people’s finger becomes thinner, and rings slip away from them while swimming or playing in the water. The same is true for various chains, bracelets, and other jewelry.
As a rule, all valuable findings are under water, but not far from the beach because most of the people swim there.
During the day, it’s better to dive with an underwater metal detector, and in the evening, you can walk along the beach with a ground search metal detector. You are welcome to read about underwater and waterproof metal detectors here.
An advantage of beach hunting is that precious metals don’t get oxidated in brackish water, as well as this is the only type of metal detecting that has a renewable source of valuable findings, and they are the most expensive ones.
However, there are disadvantages, too.
First of all, this is a huge amount of non-ferrous trash you’ll have to dig. Secondly, this is the observers’ attention you attract. So, you should be ready to have lookie-loos around you.
Forest
Metal detecting in the forest is successful most of the time. Here people used to build houses, and there were military camps during the war there. In the old times, lots of small but important roads passed through forests to connect various settlements.
Abandoned roads, where thousands of people used to walk, don’t disappear as quickly as their settlements. If you follow one of such roads, they will almost for sure lead you to some old settlement.
Usually, you can see some kind of square or rectangular deepening at the place where the house used to be, and it stays visible for many years. Quite often, you can find some bricks, stones, and furnace bricklaying remnants.
Also, some pits that indicate the places where cellars used to be, indicate that there was a village there. Please, keep in mind that all the signs mentioned above are better visible in early spring or late fall when there isn’t too much grass around.
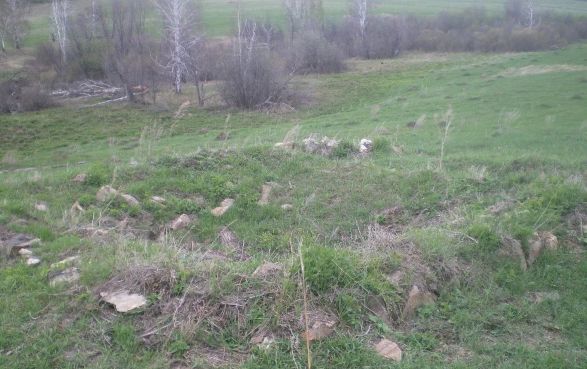
At this kind of place, you can find many interesting and valuable findings: old coins, various weapon remnants, some household items, clothes, jewelry, etc.
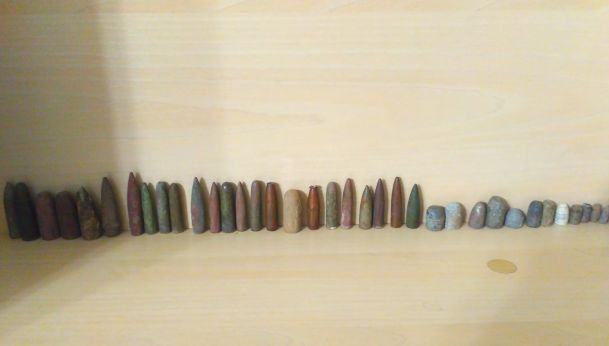
If you go further into the woods, you can find bullets (from modern to musket ones). In the forest, you can find old axes, horseshoes, headsaws, etc. and sometimes there is even a marking stamp seen on these, which makes the finding more valuable and interesting to study.
If there is a stream, lake, or another water basin in the forest – this is definitely a place for metal detecting.
Parks
Park is a perfect metal detecting location, but only if this process is allowed there. Of course, not all parks are open for treasure hunting. But if you find the one where you can go metal detecting, it will provide you with lots of findings, especially coins.
There are no specific approaches to use in this case, but you’ll have to dig a lot since parks are full of various iron trash.
Fields
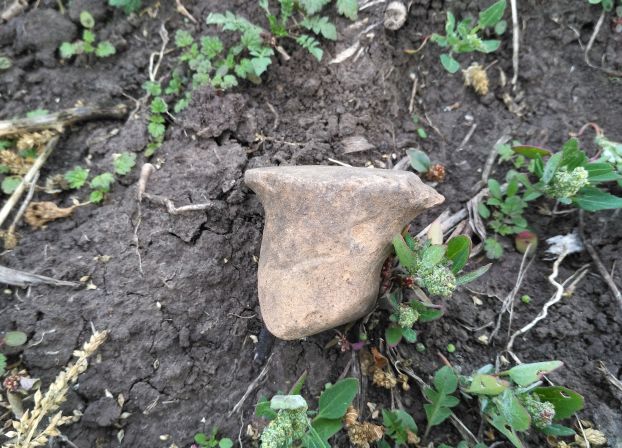
An important indicator to select a field where valuable findings may potentially be detected is the number of stones, bricks, ceramics scattered around.
Ceramics is of special interest in this case. If you have experience digging in places like this (but you don’t), you’ll be very surprised by the number of ceramic remnants around.
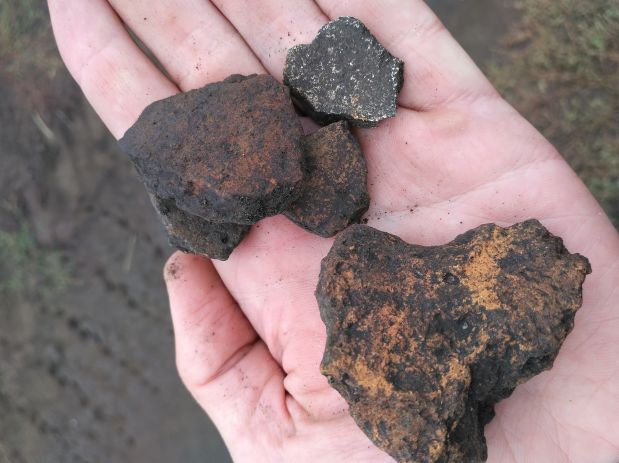
However, it has a rather simple explanation. Ceramic items are perfectly preserved in the ground, but in ancient times, ceramic pots didn’t serve for a long time due to poor and primitive technology used to make them.
So when such a pot got broken, people just throw the remnants under their feet.
Fields that are actively used for farming aren’t likely to suit for metal detecting. Every year they are fertilized, and chemical substances destroy all metal objects in the ground that can be of any interest for a digger.
Old houses
Let me mention right away, that this type of metal detecting is legal in some countries. Old houses are pulled down, people relocate, and lots of old stuff is left there. Make sure that you thoroughly study the regulations before doing this kind of metal detecting!
When treasure hunting in old buildings, you should always keep in mind that these have been abandoned for some time.
The roof gets rotten as well as ceiling rafters, which makes it quite dangerous spending time inside such houses. You should be extremely careful when metal detecting inside or around old house sites.
Before getting inside, you should check the doorsteps, the door itself, and the door cheeks. Inside the house, you should check windows and windowsills, and you may find something interesting there.
If there is a stove inside the house, you must check it as well. Coins may be hidden near the holes for chimney sweeping, and also in the upper part of the stove. The floor is also worth checking.
After checking the rooms, you can go to the attic. You definitely shouldn’t neglect searching there – quite often detectorists find troves there.
However, the complexity of treasure hunting increases because old house attics are usually full of old everyday items. Thus, first, you will have to clean up the place before metal detecting there.
First metal detector
In my opinion, two essentially different approaches can be used when selecting a metal detector, and both of them deserve attention.
The first one is to get an inexpensive metal detector.
Please, note, not cheap, but an inexpensive one. There is lots of cheap trash on the market, but it will bring nothing but a disappointment to the user. You aren’t sure what kind of metal detector to get? You are welcome to read our post about the best metal detectors for beginners.
There you will find inexpensive device models, but they do work, and you’ll be able to find valuable findings with their help. The simplest metal detector model costs about $150, and the most expensive one is about $450.
Actually, if you get at least the simplest device of the very beginner level, yet you will find something interesting or valuable.
The idea of buying an inexpensive metal detector is reasonable and feasible. Because, can you imagine a situation when you bought a metal detector, spent about several weeks using it, and decided that treasure hunting is not really your thing.
That’s why we often can see announcements saying that somebody is selling a new metal detector in warranty. Usually, there are beginner detectorists who are posting such announcements.
They’ve tried metal detecting and understood that it’s not for them. So, if you decided to take up this hobby, but you aren’t sure that you’ll like it, getting a metal detector for beginners is a good idea.
If you like the process, you can easily sell the device, add some money, and then get a more advanced model.
Another option is getting a mid-level metal detector.
You can find some good models in our review of the best metal detectors here.
You know, when I was choosing my first metal detector, I did the same as mentioned above. However, now, when I’m an experienced detectorist, I think that starting from getting a mid-level metal detector is reasonable as well.
However, this applies to those who already know about metal detecting. This approach is for those who are sure that this hobby is their cup of tea. If this is about you, then a metal detector for beginners will quickly fill your needs, and you’ll want more.
Thus, after using the device for a month or more, you’ll be thinking about getting a new one. This is inevitable.
Such a situation brings you extra trouble and loss of money. In case when you get a mid-level metal detector, in most cases, its possibilities will meet your requirements.
The only thing that you definitely shouldn’t do is getting a professional metal detector at the beginning. Trust me, settings and characteristics of these devices are so specific and wide, that even a professional detectorist will need time to go into the matter.
In case when this is your first metal detector, you’ll just spend loads of time and effort on studying the device and its settings.
I want to emphasize that the differences between metal detector models extend far beyond the device types mentioned above.
For example, there are metal detectors for kids that cost up to $100 and gold prospecting metal detectors that may cost up to $9000.
Basic metal detecting accessories and additional equipment
A conventional image is that all a treasure hunter needs – is a metal detector! But after getting one, a beginner detectorist suddenly finds out that this isn’t enough.
You should get a spade, a pinpointer, a bag for your findings, a backpack, a thermos flask, etc. So, what else should a successful treasure hunter have except a metal detector?
Pinpointers
This device is a small-sized detector that determines the exact location of the object. Using a pinpointer is convenient because it helps to find objects faster. Besides, it prevents them from accidental damage while digging and also ensures that you won’t miss some small targets.
The device appearance resembles a flash-light; it is small-sized and convenient to use. Depending on the specific pinpointer model, it uses light, sound, or vibro indication.
Nowadays, there are several dozens of pinpointers on the market. They differ in size, power, functionality, and price. We’ve described the best pinpointers in a separate article.
Search coils
The main component of a metal detector is a search coil that is used to scan the ground and detect objects. As a rule, metal detectors are equipped with the most multi-purpose search coil that will do for most of the treasure hunting tasks. Usually, a standard metal detector coil doesn’t let to get the most of the device.
For example, for metal detecting in the fields, it’s desirable to have a search coil of large diameter, since it allows detecting deep targets. But if you are detecting somewhere in the abandoned site or a park, such a coil will drive you crazy, because various iron trash will bury the signal in noise. Metal detecting in this kind of place requires small coils.
Besides, there are several types of search coils (DD and mono) and lots of other peculiarities. Here you can read in detail about the search coils and here about frequencies.
In simple terms, you may need additional search coils, but this isn’t a must.
Headphones
Most metal detectors have internal speakers through which they send target signals from the coil when it moves over a metal object in the ground. However, it is not always convenient to use a device with internal speakers: the target signal may be too quiet, and you may miss them due to the background noise outside.
Besides, if you go treasure hunting near a highway, railway, airport, or any other noisy place, it’d be rather challenging to hear the signal from the internal speakers, even if it is loud.
Here you can read in detail about the headphones for metal detecting.
This is why expert detectorists use headphones: this way, you make sure that even the quietest signal won’t be missed, which also increases the metal detector performance.
Headphones may have a different design (wireless or wired ones), jack type, size, sound data, and price. For metal detectors from middle and high price brackets, headphones are a must, and they are included in the device package set (but there are sets without headphones).
When selecting headphones, you should pay attention to the following:
- They should have soft ear pads. These will allow using headphones for a long time without any inconveniences.
- Jack type. If the device has a different jack type, you can use an adapter.
- Wire type. It can be smooth or spiral: the second option is better since such wire can stretch, and it creates fewer problems when digging. Besides, it is usually thicker; thus, it is less likely to be damaged accidentally.
- Impedance. The higher it is, the better is the sound quality the headphones have. Besides, the control unit battery discharges slower in this case. At low impedance, the interference will be too high, and there is a risk of missing small-sized or deep targets.
- Ability to adjust the volume.
Many modern headphones are wireless: this design is more convenient. However, when using such headphones, you shouldn’t forget to check if the device battery has enough charge.
If you are choosing between getting wired and wireless headphones for your metal detector, always choose wired ones. Trust me, and you’ll never be sorry for paying some extra money for them.
Coil covers
Places where we go for metal detecting and where we wave the search coil, have on their surface lots of solid objects which are dangerous both for the metal detector and for its coil. These can be soil itself, plant stems, stones, snags, bricks, etc.
That’s why, to protect search coil sensors from the outdoor environment, they have coil covers.
The manufacturer’s coil cover is usually a plastic cover that has the same shape as the coil. You put it on the search coil and fixate it there, which is convenient and efficient.
Although most of the modern coils are made of rigid plastic, as for me, I’ve concluded, that the coil cover is a must, since this way, the coil serves much longer. Quite often, the coil slides on various abrasive surfaces, it hits stones and sometimes hits too hard.
Whether you want it, or not such things happen.
When getting a metal detector, make sure that its coil is supplied with a cover. If it is not, get the one.
Since buying a new coil each season isn’t the best idea. However, if you go treasure hunting once in about six months, even in 5 years, the coil will still be good.
Protective cases
Quite often we go metal detecting outside when it rains or snows, and if the device doesn’t have a waterproof case, you should think of protecting its main components, namely its electronic units.
For this purpose, you can get special cases that protect the control unit and keyboard, which are sensitive to humidity from water and dirt ingress.
Protective cases can be classified using the following parameters:
- Device type the case was made for. You can get a case for the keyboard, control unit, accumulator, besides there are protective cases for the whole device as a unit, which are convenient to store or carry a metal detector.
- Type of fixation system. The most popular protection cases are those with zippers. There are models for keyboards that are fixated to a user’s wrist and simplify the process of the metal detector control. Also, on sale, you can find some enduring protective cases using clips.
- There is a transparent window to see the device readings. Such protection cases are used for metal detectors that have control units with a display. Some models are made from non-transparent waterproof material: they are aimed at accumulator protection.
- Manufacturing material. The protective case can be made from some special material, plastic, silicone.
As an example, we can name a silicone small-sized protection case for XP Deus control unit, and also cases for Nokta Impact.
Backpacks, bags
Storing and transporting a metal detector, accessories, and additional devices is a task that should be done using specialized equipment. The modern market offers a wide range of backpacks and bags to carry metal detectors and accessories for them or to carry the whole set together.
Here are the advantages of using such specialized bags:
- Easy to store. In a backpack, all the devices are in their entirety and good condition, while lots of the backpack pockets and sections allow its owner having all necessary things within easy reach. Using a specialized bag is convenient both for interseasonal storage and during metal detecting outside.
- Convenient transportation. Many backpacks are equipped with special straps and are designed to enable carrying them for a long time without getting too tired.
- High endurance, due to which you can be sure that a bag or a backpack won’t tear while you are carrying a metal detector and other stuff in it.
- Many backpacks have a waterproof cover, which makes using them to store various devices the safest way, especially if a metal detector doesn’t have a protection case.
Some metal detector manufacturers make their own branded backpacks (for example, XP company), but to tell the truth, you can use any other suitable backpack or a bag. For a long time, I’ve been using an ordinary backpack, then I got a specialized one, and I must admit that this one is much more convenient.
Digging tools
As for digging tools, these highly depend on the area where you go metal detecting.
Somewhere these can be shovels or spades or Black Ada, and garden cutleries are used as well. But the idea is the same.
Digging tools can differ according to the following criteria:
- Design. They can be solid or folding: the first type is more enduring and rarely gets broken, while the second one may have an adjustable length and turn into a real sapper spade.
- Size. A standard shovel has a long handle, while a spade has a short one, which makes the latter more convenient for a more detailed ground study.
- Manufacturing material. As a rule, the digging tool handle is made from fiberglass or wood, and some models go as one unit: they weigh more, but they can stand higher loads.
- A digging tool should have a one-side grinding or a serrated blade.
Besides various shovels, you may also need a spade while digging your finding out from the ground.
The spade is used when you need to sieve the soil while looking for small metal objects or find an object in the unsettled ground.
Quite often, spades are used while beach hunting and in the mountains, where the terrain consists of small-grained breakstone.
Actually, the topic is rather broad and it requires a special article to discuss it.
How to dig your findings correctly?
Quite often, one can see a situation, when the finding is exciting and valuable, but the detectorist looks unhappy and sad.
What can make a person who found something he wanted so much and didn’t even hope to find so depressed? What makes him feel sad?
It turns out that sometimes you can dig out a finding, but it can become irreparably damaged during the process.
Sometimes some detectorists use their digging tools (shovels, spades, knives) so actively while digging the target that they bring it to the surface in pieces.
But if you do it wisely and without haste, you can dig an object that it will be 99% guaranteed to have the same appearance that it had under the ground.
Step 1
Before you start digging an interesting target signal, you should define its precise location in the ground. Often it is performed with the help of a metal detector by pushing a pinpoint button. You move the coil above the target until you get where the target center is.
This is when the 1st mistake is made: a digger defines target signal location only from one side, while it should be dome from at least two sides to get a more precise location of the target in the ground.
Step 2
When you finally have the idea where exactly the target is, you should start digging it. Many detectorists make the 2nd mistake: they strike the shovel blade into the place where the device detects the target. Ideally, you should step aside at least 2-4 inches from this point on each side.
Sure, it is more challenging to dig this way (especially if this is the 100th hole you are digging), but this way you won’t cut you winding with a shovel.
Many diggers just strike the shovel into the ground and take the ground out of the hole. It’s better to dig a square around the target location and carefully remove the soil from it and then start studying it thoroughly. Otherwise, you can damage the finding.
Step 3
If you didn’t succeed in digging out the target from the first attempt, check the hole walls with the heal of a pinpointer (if you have it). If you don’t have a pinpointer, check the target signal with a metal detector and repeat the actions by digging the target again (several inches away from the target center).
Step 4
If you finally got the finding from the ground and the soil is frozen (if it is frosty outside), or it is pasted all over with too dry soil, that you can’t remove, you shouldn’t scratch it or try to tear it away somehow on the spot.
You should do as follows: put your findings together with this piece of soil into a plastic bag. At home, you’ll be able to wash and carefully clean the finding. Otherwise, there is a risk that you scratch or even break the finding.
How to clean your finding
The task and the topic itself is rather challenging to deal with. You won’t believe me if I tell you that there are dozens of ways to clean findings. Most of them end up with throwing the finding away.
Let’s take coins as an example. These are the most common findings, and some of them can turn out to be rather valuable, and they can be easily damaged. Coins are made from several types of metals.
So, you bring your coin home.
The first stage
This stage aims at removing the dirt. To do this, out the coin into an ordinary soap solution for a while. The solution will soften the encrusted dirt and other foreign matters. You should wait till they exfoliate themselves without applying any efforts.
Metal alloys used for minting ancient coins mostly have high resistance to the humid environment; that’s why staying in water or soap solution won’t damage them.
Nevertheless, you should control how long they stay there. It shouldn’t last longer than necessary. This is especially true for corrodible alloys using steel or iron base.
The second stage
You should define what alloy was used for the coin minting since if one cleaning substance is suitable for some alloy, at the same time, it can be damaging for another one.
Be very careful with copper coins. After losing patina, they gain intense poppy red and become almost unsalable.
That’s why, when working with copper samples, you should either skip this stage and leave the coins as is, or learn some ways of artificial patina creation to get the coin its original appearance back.
It’s important to understand that patina on copper samples isn’t some external layer of the metal alloy, since this is a part of the item made from it (of the coin in this case).
With time the coin loses almost all its relief. Thus, after removing patina, you may not see any dates, images, signs under it, and get just a strange faceless round metal thing instead of an ancient coin.
The third stage
The easiest task is to clean silver coins since this metal is quite an impact-resistant one. I won’t name some specific methods, since you can easily find them yourselves.
The simplest and safest way of cleaning other kinds of coins is to use a soap solution. Pour boiling water and add soap powder or liquid soap into a hermetically sealed plastic container.
The type of soap isn’t essential; the main thing is that it has an Ethylenediaminetetraacetic acid (EDTA) in it. The substance isn’t toxic itself, but as one of the soap components, it perfectly cleans coins.
When the solution becomes dense, put the coins in it. In a day or two, remove them and clean with a toothbrush. Repeat the process until you get the desired result. Some oxides can be carefully removed using a wooden pick tooth.
The drawback of this method is that it takes too long. But its undoubtful advantage is that all the dirt and oxides are removed carefully without damaging the coin.
This is the only approach I can advise to use. I’ve used it many times and almost always successfully.
Sadly, there is a class of coins that can’t be recovered whatever you do, since instead of copper, they consist of oxides. So, even the method mentioned above damages them. But, there is nothing that can help in this case.